Github repository address:
https://github.com/maillab/cloud-mail
Feature Overview
 Low Cost Usage: Can be deployed on Cloudflare Workers to reduce server costs
 Responsive Design: Responsive layout automatically adapts to PC and most mobile browsers
 Email Sending: Integrated with Resend for sending emails, supports mass mailing, embedded images and attachments, and viewing send status
 Admin Features: Manage users and emails, RBAC (role-based access control) for feature and resource usage restrictions
 Attachments Support: Send and receive attachments, save and download files with R2 object storage
 Email Forwarding: Incoming emails can be forwarded to a TG bot or other providers’ mailboxes
 Open API: Supports batch user creation via API, multi-condition email queries
 Data Visualization: Use ECharts to visually display system data details and growth of user email usage
 Customization: Customize website title, login background, and transparency
 Human Verification: Integrated Turnstile captcha to prevent mass bot registrations
Setup Guide: YouTube video, also where I discovered this project
Setup Guide: Text Summary Version
Prerequisites
- A CF (Cloudflare) account
https://www.cloudflare.com - A domain already hosted on CF
- Resend account
https://resend.com
Steps
-
Go to the Github repository and Fork this project (If you find this project great, please support the author
 )
) -
In CF, create both a D1 database and a KV namespace (names can be anything)
-
In CF, create a Workers project (Continue with Github, select the project you just forked. First time users need to link their Github account). On the deployment screen, scroll down to
Advanced Settings, expand, and set theRouteto/mail-work -
Add a custom domain for this project (must be a domain already added to your CF account, e.g.:
mail.example.com) -
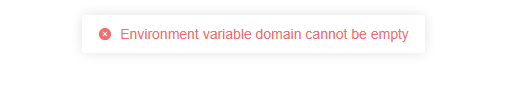
Add environment variables
Mail Domain:
Type: JSON
Variable Name: domain
Value: [“your custom domain’s root, e.g.:example.com”] *Make sure to use English brackets and quotation marks
Admin Account:
Type: Text
Variable Name: admin
Value: Your desired admin email, e.g.:[email protected]
Security Key Variable:
Type: Text
Variable Name: jwt_secret
Value: A combination of letters and numbers, e.g.: abc456xyz *The security key must not contain special characters
- Bind KV namespace and D1 database
KV Namespace
Variable Name:
kv*Lowercase only
KV Namespace:Select the KV namespace you just created
D1 Database
Variable Name:
db*Lowercase only
D1 Database:Select the D1 database you just created
- Set up email routing
- On the CF main page, click your domain (
example.com) => In the left menu, go to Email => Email Routing => Get Started (for first time setup, clickSkip onboarding guide) => At the top of the page, clickEnable Email Routing=> Scroll down and clickAdd records and enable - On the
Email Routingpage, clickRouting Rules=> Edit theCatch-Allrule => ForActionselectSend to Worker=> ForTargetselect the Workers project you just created => Click Save - Ensure the
Catch-Allrule isActive
-
Initialization
In your browser, visit: your custom domain/api/init/your security key*e.g.:mail.example.com/api/init/abc456xyzIf you seeSUCCESSon the page, initialization was successful -
Login and Receiving Mail
Now, visiting yourcustom domainwill show the mailbox login/registration page. UseSign upto register the admin email you set and set a login password for it. After registering, return to the mailbox login page to log in and start receiving emails with your admin account. -
Resend Setup & Sending Mail
- Log in to your Resend account and add your mail domain (
example.com) on theDomainspage, wait for DNS verification (Auto configure) to complete - On the
API Keyspage in Resend, create your API key (Create API key), set the key name/permissions, copy theAPI Key*Note: it is only displayed once, make sure to save it - Set mail delivery status alerts in the
Webhookspage: clickAdd Webhooks, inEndpoint URLenterhttps://mail.example.com/api/webhooks, inEvents typestick under theEmailsection:email.bounced(bounced),email.complained(complained),email.delivered(delivered),email.delivery_delayed(delivery delayed),email.failed(failed). The rest are not recommended. - Go back to the mailbox page, select
System Settings, in theEmailsection underResend Tokenclick+to add theAPI Keyyou just obtained from Resend; you can now send emails normally.